Vote for us on
TOP 4x4 SITES
![]()
Welcome to the newest 4x4 and offroad website for the Midwest region of the USA.
Have a look around, and sign up on our free forums at the link above.
![]()
Welcome to the newest 4x4 and offroad website for the Midwest region of the USA.
Have a look around, and sign up on our free forums at the link above.
WRITE UP DONE BY "notoriousDUG"
Exhaust manifold cracks have been a common problem on the Jeep 4.0L since they introduced the tubular exhaust manifold. There are very few 4.0 powered Jeeps out there that have been used hard that will not experience this problem if they haven't already. While not a huge or dangerous problem, the exhaust leak can get annoying. There are several good ways to fix the crack. You can remove the stock manifold and repair it, you can replace it with another stock unit (and have it crack to) or you can replace it with an aftermarket header. Repair is cheapest, about $20 in gaskets. The next option is replacement with a stock part. The most expensive is the aftermarket header. Prices vary greatly depending on what you choose and the install may require slight modification to the exhaust.
No matter what you choose to do the removal and install procedure is pretty much the same. In this case we choose to weld and repair the stock manifold. If you chose to go with a new manifold or aftermarket exhaust header simply install those instead of re-using the old manifold.
First, what you will need:
- A good set of basic hand tools, metric wrenches and sockets in common sizes. Most of what this needs is 12, 13, 14 and 15 MM. You have to have a 13MM and 14MM deep socket. Scraper to clean the gasket surface is a must. I recommend a good selection of 3/8" extensions and a universal joint. I would recommend you get the more expensive "impact" style universal, the center out better. The extra cost is worth it in ease for use.
- For parts you are going to need an intake/exhaust gasket (they both share the same gasket) and some High Temp RTV. This *should* be all you need.
When you do this you have to remove both the intake and the exhaust manifolds. The reason for this is they share a common gasket, to change the gasket for one you have to change it for the other.
I forget exactly but I want to say this took me between 3 and 4 hours not rushing it. It could be done in less. If you are a novice budget a day to it, you may not use it all but it is nice to have the extra time.
Now for the work. If you are stock height I recommend you raise the vehicle but on a lifted rig you may be able to just roll under it. Be careful placing the jackstand for the left front. You are going to have to be able to crawl under there and gain access to the 2 rear, lower manifold bolts and the nuts on the exhaust flange.
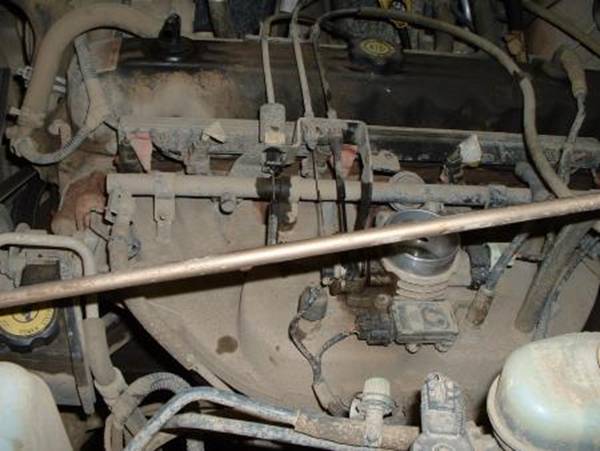
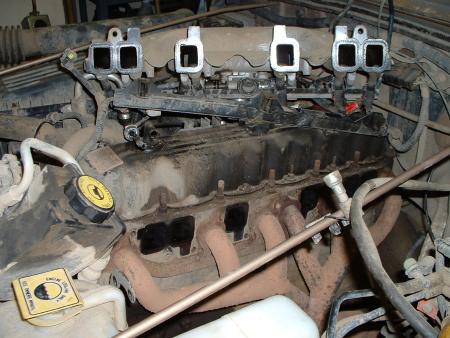
Next, disconnect the battery and remove the air tube from between the air box and throttle body. You should now have something that looks like this:
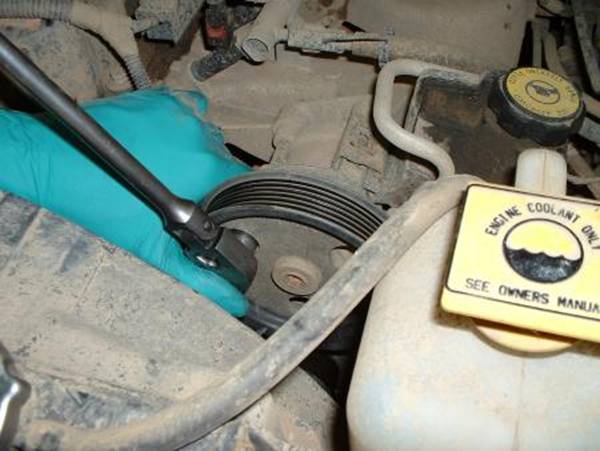
First thing I do is loosen the belt and remove the powersteering pump. The belt tension comes off by loosening the center bolt on the idler pulley below the P/S pump and then backing off the adjuster bolt till the belt slips off. Normally I just pull the belt off the P/S pulley and zip tie it to something so it does not slip off the pulleys... less work later. I choose not to disconnect the pump and just tied it out of the way so I would not have to disconnect the lines, if you are changing the pump as well remove the lines and get it out of your way. The pump pulley has holes in it that you can pass a 13MM deep well socket through, simple spin the holes over one of the 3 bolts, remove and repeat... pic below:
Next step is to remove the throttle cable, also the cruise cable and trans kick down if so equipped. The throttle cable is the aft most cable, it simply snaps off the throttle body arm. The cruise and TV cable actually slides off the arm in the direction it moves. If you look at the picture you will sort of see how it works. Basically, if you lightly pull on the cable end while opening the throttle arm with your other hand it will pop right off. They are kind of a "U" shape over a stud. Next, remove the cables from the bracket they are in. This is done by compressing the "ears" and pressing them through the brackets. The orientation of the cruise one makes it tricky but it is not to hard.
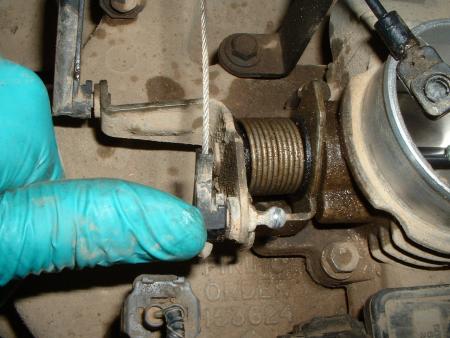
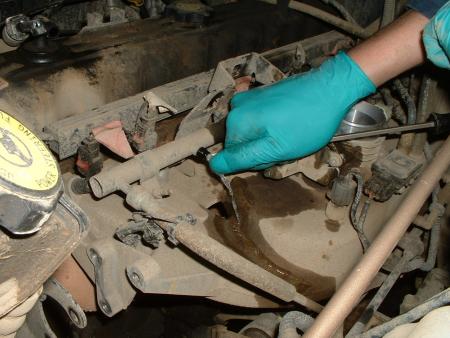
Next you have to release the pressure in the fuel rail so you can disconnect the line. First you have to locate the schrader valve on the fuel rail. It looks kind of like an oversized valve stem on a tire, here is a pic:
Remove the cap like you would the cap on your tire. Inside you will see a larger version of the schrader valve that is in your wheel. Simply press it with a screwdriver or key like you would to air down. Keep it in until the flow of fuel stops. Cool action shot below:
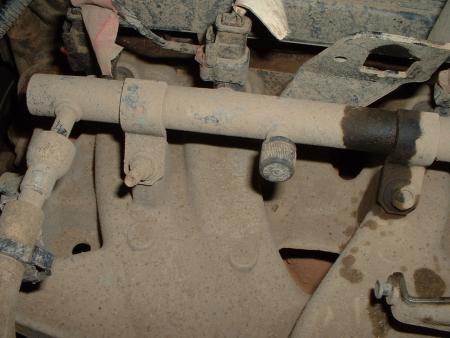
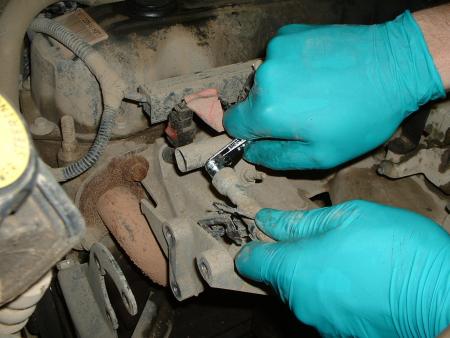
Next, you need to disconnect the fuel line. This does require a special tool. It is available for about 5 bucks at most parts stores:
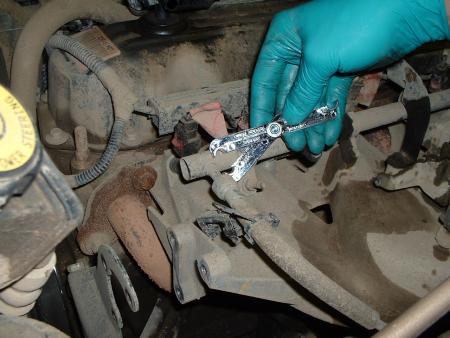
To disconnect the line pry the safety clip off of the junction and insert the correct end of the line tool into the fitting. Press hard into the fitting and gently pull on it, it should pop right off. The fitting is held on with several small spring clips. When you reinstall it, simply firmly press it on until it clicks, and it should be fine. If the safety clip will not install then the line is not properly seated. Make sure to check this area for leaks on start up:
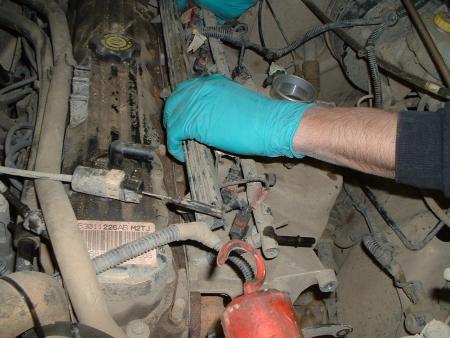
Now that you have all that done you need to disconnect the intake from the wire harness. There is one connector on the water neck you should unhook. There are also two connectors at the rear of the intake. If you separate them it will free the entire intake harness so you can lay the harness out of the way. There will still be a large "trunk" line but it is long enough and you can secure the intake out of the way. You also have to remove the bracket the connectors are on. Here are the 2 connectors:

Along the injector rail there is a big wire bundle in a plastic trough. You will need to pull the trough off the head studs so it is free to have the room to move the intake around. The trough is on very tight and is fragile. Pull up or pry around where it is snapped on the head bolts carefully. It is not uncommon to crack the trough, but as long as it is still in one piece you are OK. Here is the trough removal:
Now it is time to pull the intake! There are 6 (I think) bolts holding the intake on: 2 on the top and 4 on the bottom. The 2 front bottom ones are easiest to get from the top while you may want to get the rear 2 from under the Jeep. All 4 of these will require some extensions and a universal... along with some serious arm-twisting. I always remove the bottom first so I can hold the intake when the last bolt comes out. I forget if there are 4 or 2 on the top... anyway it will be obvious. The bolt directly in the center behind the throttle body can stay on for now, it is in the exhaust, not the intake. Same goes for the front and rear nuts that only go in the exhaust, leave them for now. The rear most is a bit hard to get to but no big deal. After you remove the last bolt simply wiggle the intake off the locating pins and flip it up on top of the valve cover like this:
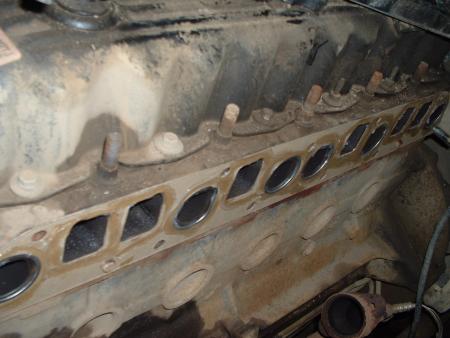
Now for the exhaust manifold. First, crawl under there and remove the flange nuts. There are 2, they are 14MM and they are pain to get to. I used a socket and universal with an extension all snaked around and it still sucked. This may be you biggest fight. If you get really stuck pull the O2 sensor to get better access, but I was able to get buy leaving it in. Then simply remove the 2 nuts and one bolt in the exhaust manifold and pull it out of there. The space left looks like this, only with out the new gasket in place:
I repaired the cracked manifold in this case. Here is the super cool welding picture my ace photographer took. I post it because it is cool and I rock.
At this point you simply need to reverse the removal process. A few hints… When you go to put the gasket on coat both sides with a LIGHT coat of RTV on both sides around the intake and exhaust holes, then set it on the alignment pins, it should hang there and be happy. Now thread the lower intake bolts and washers on about 2 threads. This way they are started and the intake will still fit behind them. Put the intake in place and start the uppers, now tighten them all down. I also like to use a dab of RTV on the exhaust flange but it is not necessary. When you start it up the RTV may smell bad or smoke for a moment or two - no worries. Make sure to check around the fuel line for leaks.